
Table of Contents
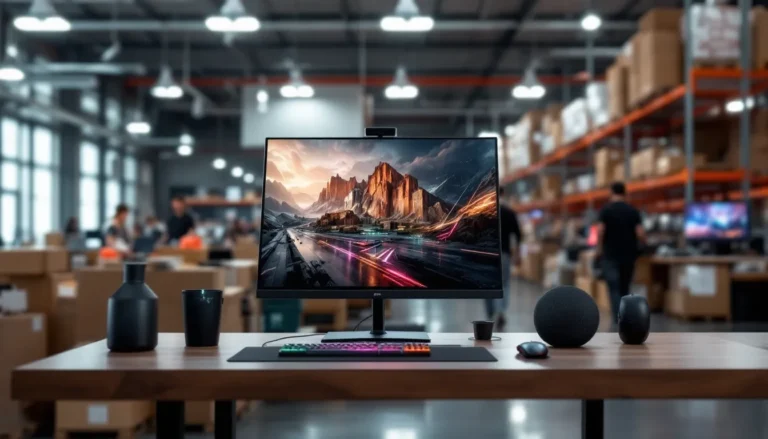
ToggleYeti gaming gear has become a staple for serious gamers, streamers, and esports competitors over the past few years. Whether you’re grinding ranked matches, streaming to thousands of viewers, or just hanging out in Discord with friends, the quality of your audio setup can make or break your entire experience. Yeti microphones and audio equipment have earned their reputation for delivering studio-quality sound at consumer-friendly price points, and in 2026, their gaming-focused lineup is more refined than ever. This guide breaks down everything you need to know about Yeti gaming gear, from which models are worth your money to how to set them up properly for maximum performance across all your gaming needs.
Key Takeaways
- Yeti gaming gear delivers studio-quality audio at consumer-friendly prices, with models ranging from the compact Nano to the professional Pro Studio suited for streamers, competitive gamers, and casual players.
- Proper Yeti microphone placement (6-12 inches from your mouth), shock mount usage, and room acoustics are essential to maximize audio clarity and minimize background noise without expensive equipment.
- Yeti microphones offer cross-platform compatibility across PC, console, and mobile devices, making them ideal for gamers with multiple gaming systems who want a single reliable audio solution.
- Clear voice communication through Yeti gaming microphones provides a genuine competitive advantage in ranked play by ensuring teammates hear callouts instantly without distortion or miscommunication.
- Setting optimal audio levels (50-75% input gain, -12dB to -6dB average), enabling noise suppression in Discord or streaming software, and keeping firmware updated ensures peak performance for all gaming scenarios.
- Yeti’s durable metal construction and long-term Logitech support make the investment worthwhile—owners report 3-5 years of reliable performance without audio degradation or connector failures.
What Is Yeti Gaming?
Yeti gaming refers to the range of gaming-specific audio equipment manufactured by Blue Microphones, now owned by Logitech. The brand has positioned itself as a premium option for gamers who care about audio quality without wanting to spend thousands on studio-grade equipment. Yeti’s product line includes USB microphones, analog microphones, audio interfaces, and specialized streaming equipment designed to work seamlessly with PC, console, and mobile platforms.
What sets Yeti apart in the gaming space is their focus on balancing accessibility with professional-grade performance. Their microphones use capsule technology that captures voice with clarity and minimal distortion, even in less-than-ideal acoustic environments. Most Yeti gaming mics come with plug-and-play USB connectivity, meaning you don’t need a complicated audio interface or years of audio engineering knowledge to get decent results out of the box.
The Yeti brand has become synonymous with gaming content creation, particularly streaming. You’ll see Yeti mics everywhere in gaming setups, on Twitch, YouTube, and in esports facilities. That visibility isn’t just marketing: it’s a reflection of real gamers choosing Yeti gear because it works reliably and sounds professional.
Yeti’s Most Popular Gaming Headsets and Audio Equipment
The Yeti Nano USB Microphone for Streamers and Content Creators
The Yeti Nano is the compact, more affordable alternative to Yeti’s flagship microphone. Designed specifically for streamers and content creators with limited desk space, it features a smaller footprint without sacrificing audio quality. The Nano uses a condenser capsule that captures voice with clarity and minimal background noise, making it ideal for gaming streams where chat interaction and commentary quality matter.
Key specs include USB plug-and-play connectivity, multiple pickup patterns (cardioid, omnidirectional, figure-8, and bidirectional), and a built-in gain knob for quick adjustments during gameplay. The Nano also features a mute button on the microphone itself, letting you silence audio instantly without fumbling through software. For streamers on a budget or anyone with limited desk real estate, the Nano delivers solid performance at a lower price point than the full-size Yeti.
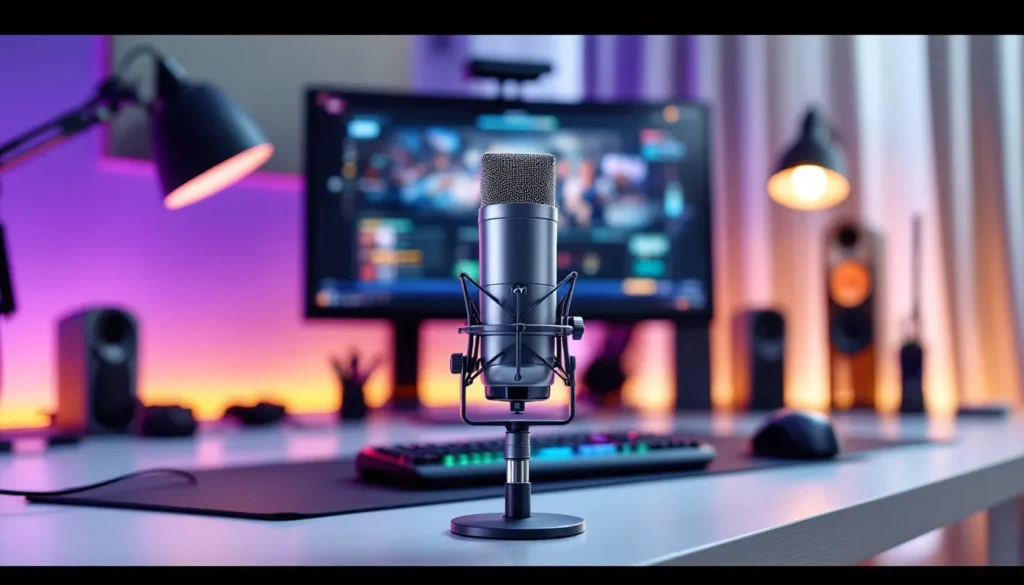
Yeti Microphone Performance for Competitive Gaming
When you’re playing competitive games, whether it’s Rainbow Six Siege, Valorant, or Call of Duty, voice communication clarity can directly impact your team’s performance. The Yeti (full-size) microphone excels here with its larger capsule, superior sensitivity, and excellent rejection of ambient noise. Competitive gamers appreciate that Yeti mics cut through background noise naturally without requiring aggressive EQ adjustments that can make your voice sound thin or unnatural.
The full-size Yeti includes multiple pickup patterns, allowing you to switch between cardioid mode (for isolating your voice) and omnidirectional mode (for capturing room audio or multiple people). The microphone’s frequency response is optimized for human speech, emphasizing the 2kHz-4kHz range where vocal clarity lives. In ranked play, your teammates need to hear callouts instantly and clearly, the Yeti delivers on that.
Yeti Pro Studio: All-in-One Gaming Audio Solution
The Yeti Pro Studio represents Yeti’s premium gaming audio package, combining a broadcast-grade microphone with an integrated audio mixer interface. This model is built for gamers who want professional studio quality without the complexity of managing separate hardware. The Pro Studio includes the Yeti Pro microphone, a built-in mixing console with four channels, and direct monitoring, meaning you can hear your own voice and game audio together in real-time without latency.
What makes the Pro Studio standout is its versatility. You can route game audio, Discord, Spotify, and your microphone into separate channels, adjust each one independently, and output a clean mix to your stream, recording software, or teammates. For serious streamers and esports professionals, this all-in-one setup eliminates the need for third-party mixing software or additional hardware. The Pro Studio’s audio quality rivals dedicated studio microphones, and its build quality suggests it’s made to last through years of daily use.
Why Gamers Choose Yeti Gear Over Competitors
Audio Quality and Clarity for Competitive Advantage
Yeti microphones are engineered specifically to capture human speech accurately. Their condenser capsules pick up voice details across a broad frequency range, delivering clarity that allows teammates to understand callouts the first time they’re spoken. In competitive gaming, miscommunication costs rounds and matches, having a mic that reproduces voice faithfully is a genuine competitive advantage.
Compare this to cheaper USB mics, which often color voice audio with boominess or muddiness. Yeti’s approach is to let the voice come through naturally, then let the user adjust EQ in their streaming or recording software if they want a specific sound. For esports players, this means your comms sound professional and trustworthy, which subtly reinforces team confidence.
Build Quality and Durability for Long-Term Use
Yeti gear is built with metal construction and reinforced cables designed to withstand daily abuse. The microphone bodies use metal alloys rather than plastic, and the stands ship with heavy-duty shock mounts that reduce vibration transfer. Gamers who’ve owned a Yeti for 3-5 years report that their mics still perform as expected, no dropouts, no degradation in audio quality, no connector failures from repeatedly plugging and unplugging.
This durability matters because a quality gaming mic should last longer than a single console generation. Logitech’s ownership of the brand has also meant better long-term support and driver updates. You’re not buying a mic that’ll need replacement in 18 months: you’re buying a tool that’ll be in your setup for years.
Cross-Platform Compatibility: PC, Console, and Mobile
Yeti microphones work across Windows PC, macOS, PlayStation 5, Xbox Series X
|
S, and even some Android devices via USB adapter. This cross-platform flexibility is huge for gamers who stream on PC but also want to use the same mic for console-exclusive titles or mobile games. Unlike some gaming brands that lock you into a single ecosystem, Yeti’s commitment to USB standards means broad compatibility.
On console, you’ll need a USB adapter (not included, but affordable), but once connected, the mic behaves just like it does on PC, plug, play, adjust levels, and you’re done. This flexibility appeals to gamers with multiple platforms who don’t want to buy separate audio gear for each system.
Setting Up Your Yeti Gear for Optimal Gaming Performance
Microphone Placement and Sound Isolation Tips
Microphone placement is half the battle in getting clean audio. Position your Yeti 6-12 inches from your mouth, close enough to capture clear voice, far enough that plosives (the “p” and “b” sounds) don’t cause distortion. Most gamers place their mic to the side of their mouth rather than directly in front, which naturally reduces plosive intensity and feels more comfortable during long gaming sessions.
Yeti microphones include a shock mount, and using it properly matters. The mount isolates the microphone from vibrations transmitted through your desk, which is especially important if you have a mechanical keyboard or a habit of resting your elbows on your desk while talking. Even small vibrations translate to subtle rumbling in your audio, and listeners will notice it in streams or voice comms.
For sound isolation, consider your room acoustics. Hard surfaces like glass desks and tile floors reflect sound, creating echo and background noise. Soft materials like curtains, carpets, and foam absorb sound. You don’t need an expensive acoustic treatment setup, a blanket behind or beside your mic can noticeably improve audio quality. Test different positions and listen to recordings to find what works best in your space.
Driver Installation and Software Configuration
Yeti microphones are USB plug-and-play, meaning they’ll work immediately in Windows and macOS without drivers. But, Logitech has released optional software called Logitech G Hub that provides deeper control and firmware updates. Installing G Hub is optional but recommended if you want access to equalizer settings, gain automation, or firmware updates that improve performance.
Download G Hub from Logitech’s official website, install it, connect your Yeti microphone, and launch the software. The interface is straightforward: you’ll see your microphone listed, and you can adjust input levels, enable or disable certain features, and access any available firmware updates. On console, no software installation is needed, the mic will work immediately once connected via USB adapter.
For competitive games, keep driver software up to date. Logitech periodically releases firmware updates that can improve noise rejection, fix stability issues, or enhance audio quality. Check for updates quarterly or whenever you notice any audio degradation.
Audio Levels and Settings Optimization
Once your Yeti is connected and recognized by your system, you need to optimize audio levels. The goal is to have your voice loud enough to be heard clearly without clipping (distortion from too-loud audio). In Windows, right-click your speaker icon in the system tray, select “Sound settings,” scroll to “Advanced,” and find your Yeti microphone under “Input devices.”
Set your input level to around 50-75% in system settings, then speak at normal gaming volume. If your voice sounds distorted or your teammates say you’re “peaking,” lower the input level. If you’re too quiet, increase it gradually. Most gamers shoot for a voice level that averages around -12dB to -6dB on a typical sound meter.
In Discord, OBS (if you’re streaming), or whatever voip/recording software you use, set the input device to your Yeti microphone and enable noise suppression or noise gate features if they’re available. These settings can filter out keyboard clicks and background fan noise automatically, giving you cleaner audio for comms or streams.
Yeti Gaming Gear for Different Gaming Scenarios
Streaming and Content Creation Setup
For streamers, Yeti’s advantage is versatility combined with audio quality. If you’re just starting out, the Yeti Nano gives you broadcast-quality voice at a reasonable price. Once you’ve built an audience, upgrading to the full-size Yeti or Yeti Pro Studio gives you more control and professional audio that viewers notice.
Streamers benefit from Yeti’s multiple pickup patterns. In cardioid mode, the mic isolates your voice and rejects background noise, ideal if you’re streaming from a room with a fan, AC unit, or roommates making noise. Switch to omnidirectional if you’re streaming with a co-host or want to capture ambient room audio for gameplay atmosphere. The mute button on the mic itself is valuable for muting yourself during ads or awkward moments without fumbling through software.
Pair your Yeti with OBS or Streamlabs, set the mic as your input device, enable noise suppression and noise gating, and test your audio in a short stream clip before going live. Viewers will instantly notice if your audio quality is poor, and a quality Yeti mic sets you apart from the countless streamers using cheap headset mics.
Competitive Gaming and Ranked Play
In competitive gaming, your priority is clarity and reliability. A Yeti or Yeti Nano connected to Discord gives your teammates crystal-clear callouts. Configure the mic in cardioid mode for maximum voice isolation and minimal background noise, your team needs to hear you, not your mechanical keyboard or room ambience.
Enable Discord’s noise suppression and noise gating to filter out involuntary background noise. Adjust your input sensitivity so your normal speaking voice registers at about -12dB on Discord’s input meter. Test this with a friend or in a Discord server before playing ranked matches.
The key advantage of Yeti gear in competitive scenarios is reliability. A dropped connection mid-match or audio distortion during a crucial callout can cost you. Yeti’s USB connection is rock-solid, and the microphones rarely have compatibility issues with popular games or voice software.
Casual Gaming and Social Play
For casual gaming with friends, you don’t need the premium Yeti Pro Studio, a Yeti Nano or even a budget-friendly Yeti still delivers audio quality that makes chatting in Discord or party chat enjoyable. The mute button comes in handy when you need to cough, take a call, or step away briefly without messing with software.
Casual gamers also benefit from Yeti’s plug-and-play nature. Set it up, plug it in, and it works. You don’t need to obsess over EQ settings or noise gating. The microphone handles most acoustic issues naturally, and your friends will hear you clearly without any technical fuss.
Common Issues and Troubleshooting for Yeti Devices
Connection Problems and Driver Updates
Occasionally, a Yeti microphone might be recognized by your system but produce no audio. First, check that your USB cable is fully connected and that you’re using a powered USB port (not a passive hub). Try connecting the mic to a different USB port on your computer. Sometimes USB ports go bad or provide insufficient power to the microphone.
If the mic still isn’t working, restart your computer with the mic connected. Windows and macOS sometimes need a restart to properly initialize USB audio devices. In Windows, check Device Manager to see if your Yeti is listed under “Audio inputs and outputs.” If it’s showing an error or appears as “Unknown Device,” right-click it and select “Update driver.”
Logitech periodically releases firmware updates through G Hub that can fix compatibility issues or improve performance. Launch G Hub, navigate to your Yeti microphone, and check for available firmware updates. Install them if available. These updates are usually minor and take just a couple of minutes.
On console (PS5 or Xbox Series X
|
S), ensure you’re using a powered USB adapter. Some USB adapters don’t provide enough power, causing connection dropouts. Logitech recommends officially licensed USB adapters for console use.
Audio Feedback and Background Noise Solutions
If you’re hearing feedback (a high-pitched squeal or howl through the mic), it’s usually caused by the microphone picking up audio from your speakers or headphones. Ensure your headphones are worn properly and that you’re not using your computer speakers while the mic is active. If feedback persists, lower your Yeti’s input gain and test again.
Excessive background noise, keyboard clicks, mouse movements, breathing, room noise, is usually a placement or acoustic issue, not a hardware problem. Move the mic farther from your keyboard, adjust the shock mount to ensure it’s properly isolated, and consider adding soft materials around your mic area to absorb reflections. Discord’s noise suppression is effective at filtering involuntary background noise, but prevention is better than correction.
If you’re hearing crackling or distortion during gameplay, you might be clipping (input level too high). Lower your input level in Windows settings or G Hub by 5-10% and test again. Crackling can also indicate a USB power issue: try connecting the mic to a different USB port or using a powered USB hub.
Tips for Maximizing Your Investment in Yeti Gaming Gear
Maintenance and Care Best Practices
Yeti microphones are built tough, but proper care extends their lifespan. Store your mic in a cool, dry place when not in use. The shock mount keeps vibrations out, but excessive heat and moisture can degrade internal components. If you’re traveling with your Yeti, use the included carrying case or a protective pouch.
Dust can accumulate on the microphone’s grille, which might subtly affect audio quality. Use a soft brush or compressed air to gently clean the grille every few months. Don’t use water or liquids on the microphone itself, compressed air is safer. For the pop filter (if you have one), clean it regularly with warm soapy water and let it air-dry completely before reattaching.
Check your USB cable periodically for damage or fraying. A damaged cable can cause connection issues or audio problems. If you notice any physical damage, stop using that cable immediately and replace it. Coil cables loosely when storing to avoid kinks that can damage internal wiring.
Accessories and Add-ons to Enhance Your Setup
A pop filter is one of the best investments after buying a Yeti mic. It mounts between you and the microphone to reduce plosive sounds (the hard “p” and “b” sounds) that can distort audio. This is especially valuable if you’re streaming or recording voice-heavy content.
A boom arm lets you mount your Yeti away from your desk, freeing up space and giving you more flexibility in microphone positioning. Yeti’s official boom arm is high-quality, but generic third-party boom arms also work well and cost less. Ensure whatever boom arm you choose can support the weight of your Yeti.
A shock mount upgrade might seem unnecessary, but premium shock mounts provide superior vibration isolation compared to the stock mount, especially if you have a heavy-duty mechanical keyboard or live in a busy environment. The difference is subtle but noticeable in clean recordings.
For streamers, investing in gaming monitor technology and studio lighting improves your overall broadcast quality, and your Yeti pairs well with these upgrades. Audio quality alone won’t make your stream successful, but it’s the foundation that other improvements build upon.
Consider gaming laptop reviews if you’re planning to stream or record on a more powerful system. A capable PC pairs well with quality audio gear and ensures your encoding settings don’t interfere with mic performance.
Stay informed about gaming hardware developments so you understand how new technology might complement your Yeti setup or justify future upgrades.
Conclusion
Yeti gaming gear represents a sweet spot between affordability and professional audio quality. Whether you’re streaming to thousands, grinding ranked matches with your squad, or just chatting with friends, Yeti microphones deliver clear, reliable voice communication that improves your entire gaming experience. The ecosystem of models, from the compact Nano to the all-in-one Pro Studio, ensures there’s a Yeti solution for every budget and use case.
Setting up your Yeti properly matters as much as the hardware itself. Proper placement, appropriate input levels, and understanding which settings work for your specific use case unlock the microphone’s full potential. The gear is durable enough to last years, and Logitech’s commitment to driver updates and support means your investment stays relevant as gaming technology evolves.
If you’re serious about improving your gaming audio quality, whether for competitive play, streaming, or just enjoying clearer voice communication, Yeti gaming gear is worth every penny. Start with whichever model fits your budget and scenario, master the setup fundamentals in this guide, and you’ll have audio that sounds professional and performs reliably for years to come.